How to integrate your SaaS with Bunny for tenant provisioning

Overview
Delivering excellent SaaS experiences requires ensuring customers access features and usage limits matching their subscription tier. Incorrect provisioning leads to dissatisfied customers, lost revenue, and churn.
Key Bunny Terminology
Platform: An object representing your SaaS application. Most companies maintain a single platform, though Bunny supports multiple platforms for acquisitions.
Tenant: Represents a customer’s workspace within your SaaS. Each platform contains many tenants.
Account: A customer entity holding billing details, contacts, deals, and associated tenants.
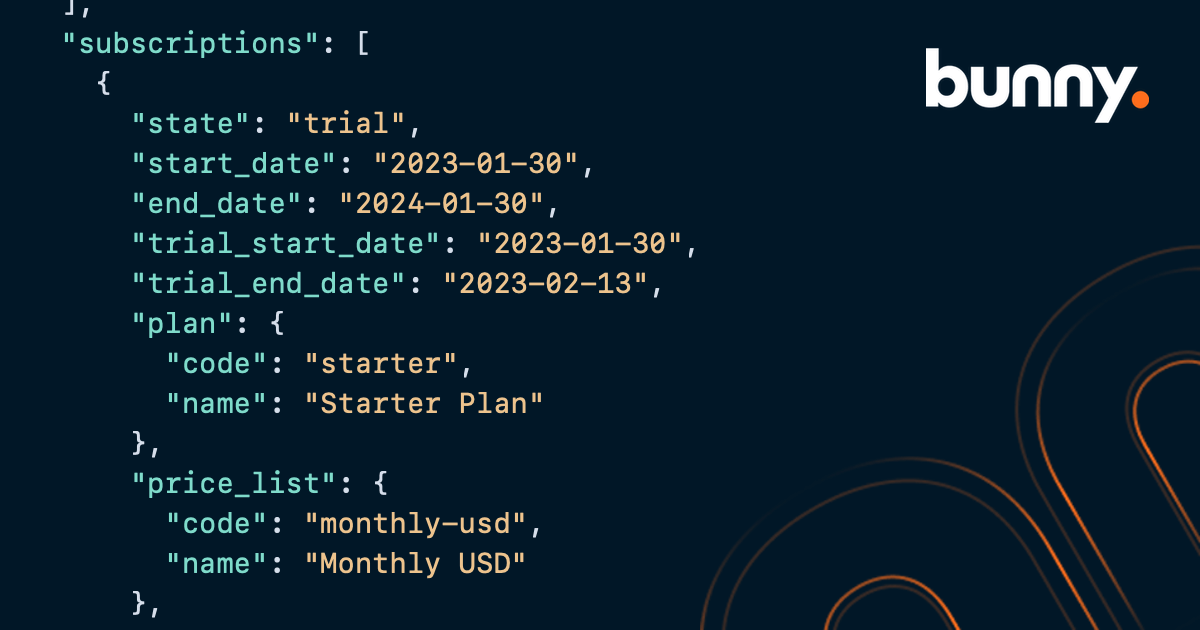
Subscription: A recurring purchase agreement connecting an Account, Tenant, and Plan with billing frequency and amount details.
Enabling Provisioning
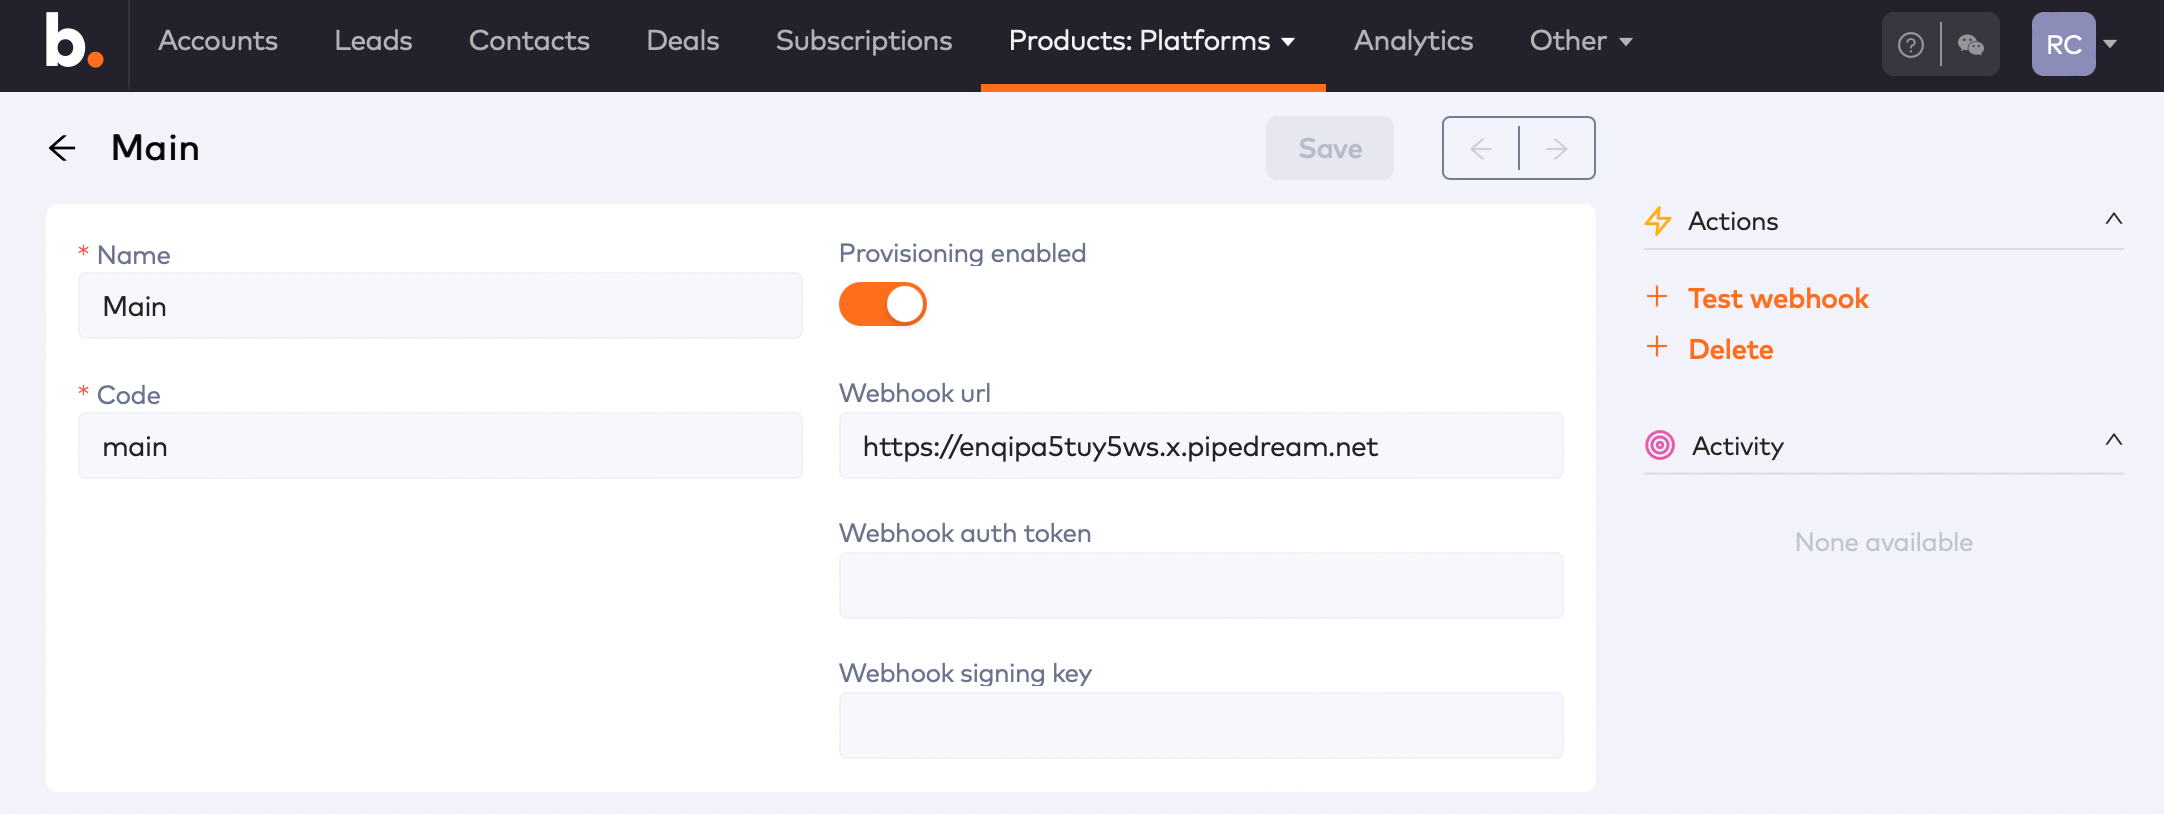
- Navigate to Products > Platforms and select Main
- Toggle “Provisioning enabled” to on
- Configure webhook settings:
- Webhook URL: HTTPS endpoint receiving provisioning payloads
- Webhook auth token: Optional bearer token for authorization
- Webhook signing key: Optional shared secret generating SHA1 signatures
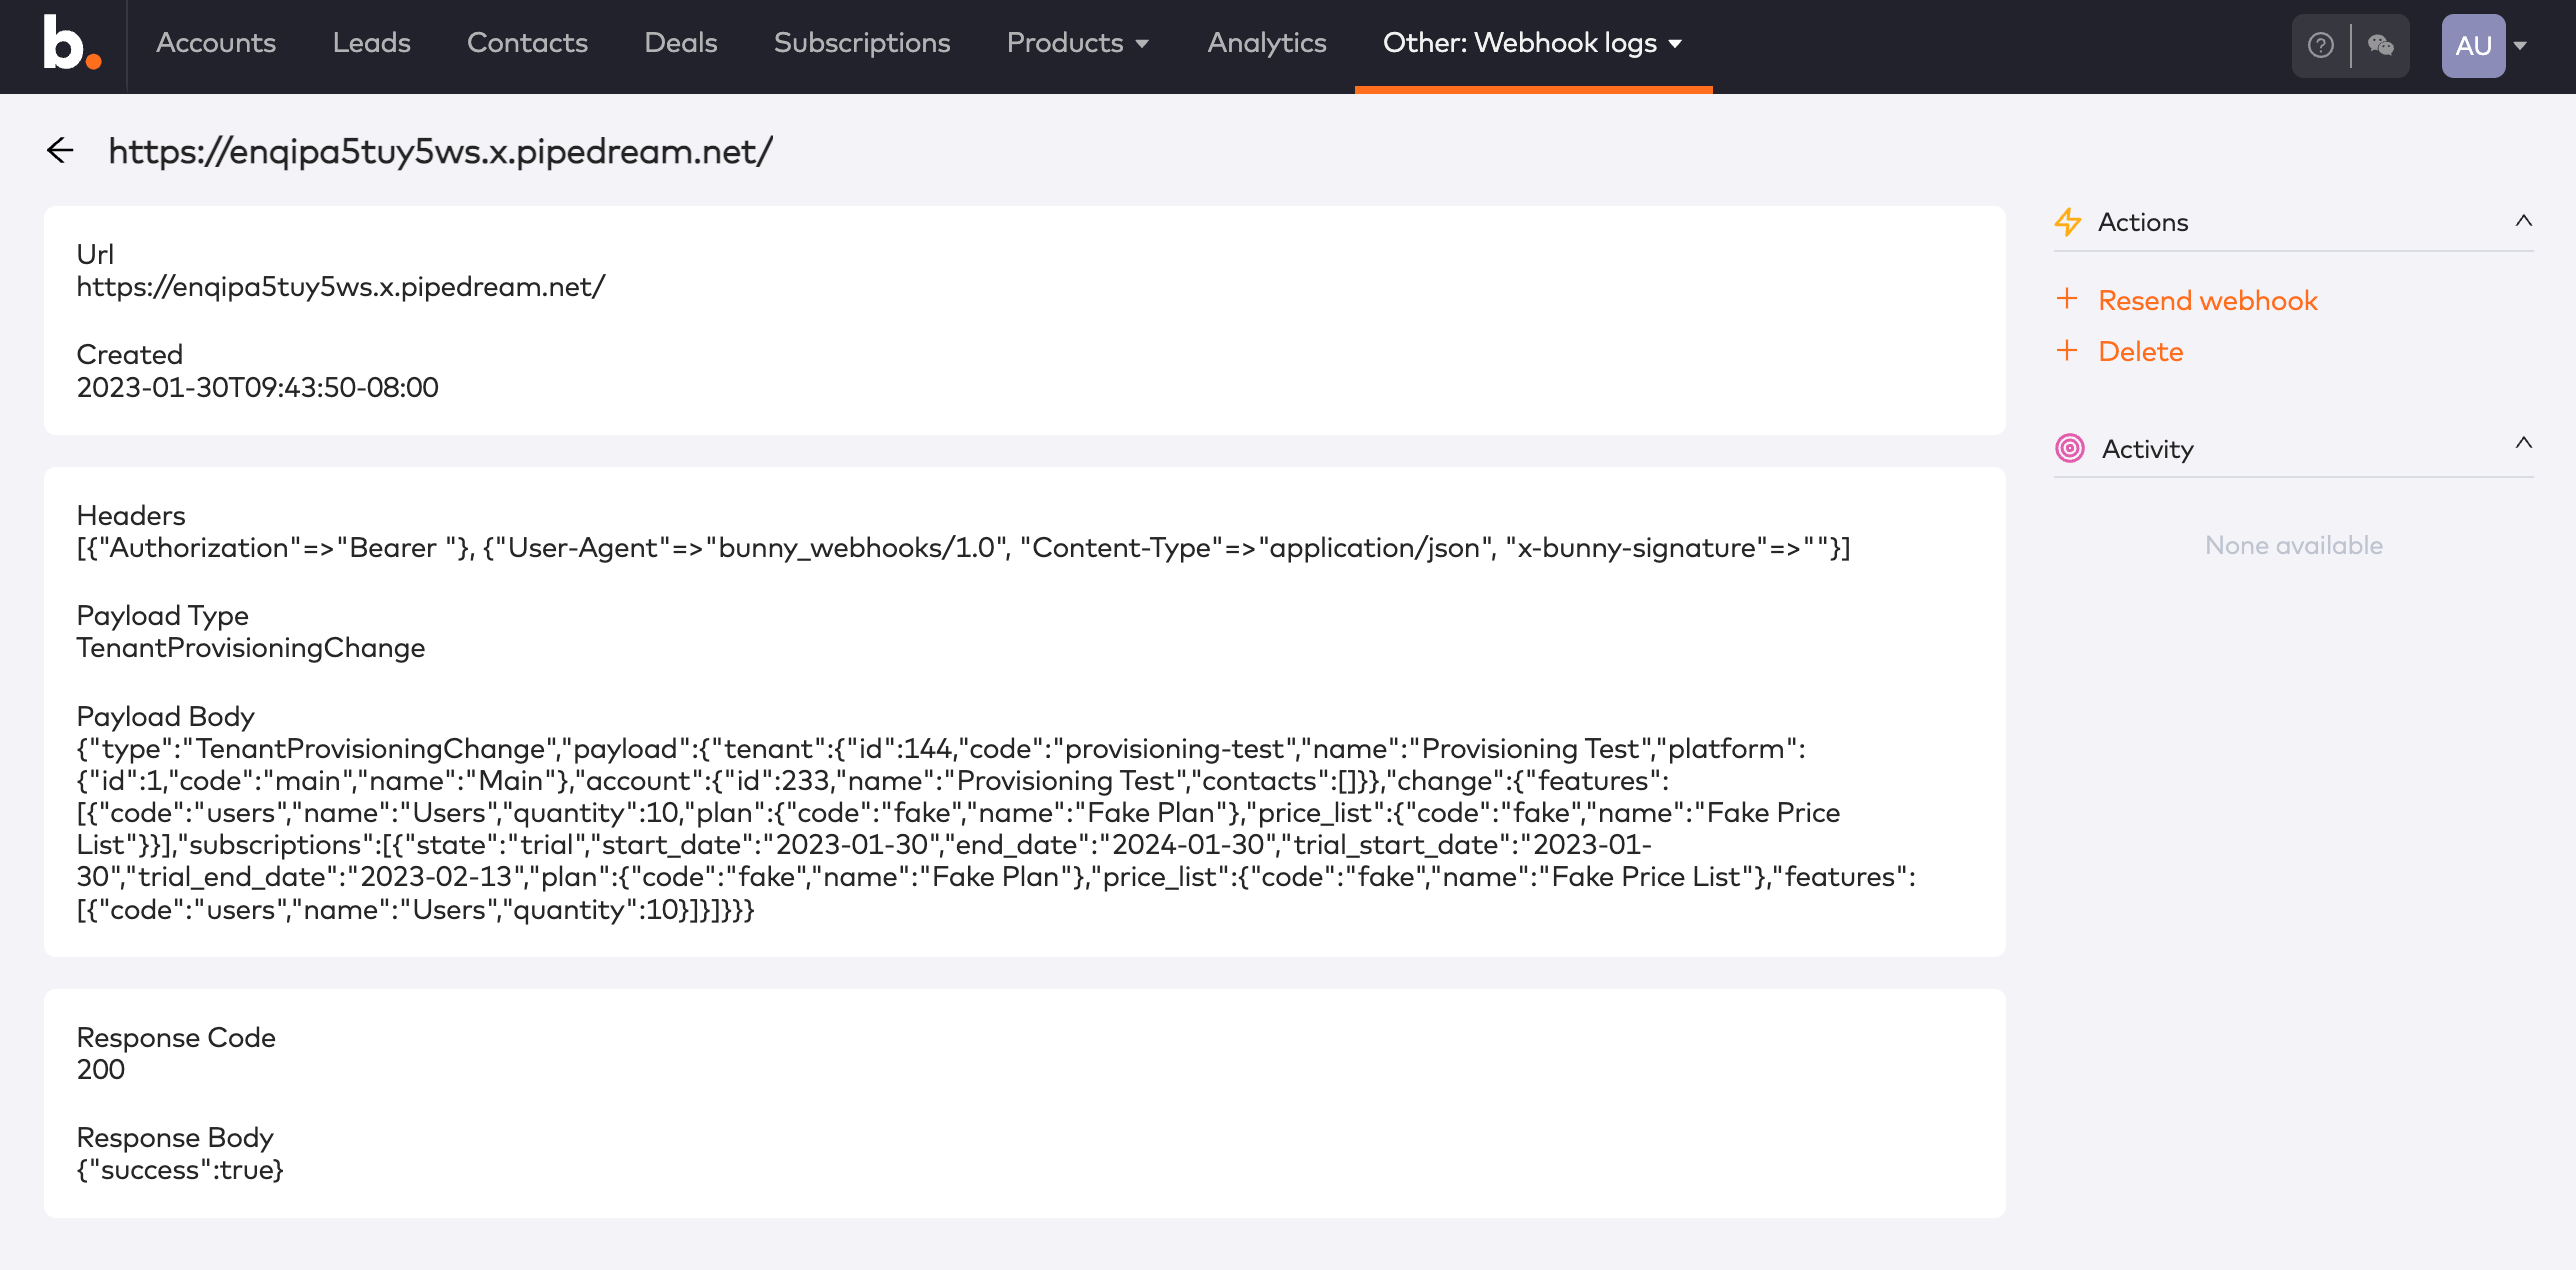
Testing Webhooks
Use the Test webhook button to validate endpoints without creating products or subscriptions. The webhook payload includes tenant information, account details, and critically, a “features” array summarizing all provisionable features across subscriptions. For example, if the Users feature indicated a quantity of 10 then you should enforce that the tenant is limited to having 10 users.
Verifying Webhook Signatures
When a signing key is configured, Bunny generates SHA1 hashes included in the x-bunny-signature header. Verify signatures using Bunny’s official SDKs for Ruby and Node.
Production Testing
Create realistic subscriptions by:
- Setting up Products and Plans via Product Quick Start
- Creating Accounts, Contacts, and Quotes through the UI
- Using the
subscriptionCreatemutation via Bunny’s API or SDKs
Debugging
Access webhook logs at Other > Webhook logs to review all requests, payloads, headers, and responses. Logs support resending webhooks for testing or production replay.